Saturday, December 7, 2013

DIY Kids Art Display

If you have been keeping up with my posts you know that we recently started doing craft time every night. This has left us with a lot of art that we really have no place for at the moment. I want to hang her stuff up because she loves looking at the things she made, but I also want to stop poking holes in the walls with 1,000 push pins. 

IKEA has a really cool solution for this. It is this little metal wire with little metal clips. But it is like twenty dollars and you can hang maybe 5-6 8x10s on it. Not worth the price at all. So I decided to make one with stuff I had around the house.

 What You Need:
Twine or some kind of string
A Hammer
Two Nails
Clothes pins (Not pictured above)


All you have to do is pick where you want this to hang and then hammer two nails in at either end. Tie your twine or string to either end with a bow or a little curly like I left, or you could even have it stop right at the nail.

Now just hang up your picture with the clothes pins and you're done! It is so simple and easy. I really like the look of the twine and clothespins together. It adds a little bit of a country look and when we get our house finished I plan on doing a lot of walls up with this kind of thing.


 You can hang whatever you want on here really. Pictures, art, recipes. The options are endless! Which is my favorite kind of storage! It is also so easy to change these as she creates more and more things.


What would you hang on these? Would you rather buy the ones from IKEA?


Tuesday, December 3, 2013

Establishing A Schedule for a Toddler

It is important to me that Emma spends the majority of her time learning to love learning and exploring rather than immersing herself into technology. When I was growing up I had a fair amount of technological opportunities but I also spent a lot of my time with imaginative play and interactive activities. I want to teach Emma in the same way. I want her to embrace technology and learn to use it to her advantage, but I also want her see it isn't the only way.

While I realize it is impossible to get a toddler on an actual schedule, she determines what time she wakes up, falls asleep, takes a nap and gets hungry, I want to have certain things we make sure we do every day.

Outdoor Play
This is really important. There is an entire world out there for her to explore. Just being outside helps her realize temperature changes, visual changes, sensory changes, new coordination skills are developed as she has to balance over the uneven ground. There is nothing better to teach a baby than by letting her explore the back yard.

We spent an hour one day simply digging a hole in the ground. She loved getting to see her small actions of shoveling out some dirt making a bigger impact and creating a hole. She loves seeing the different types of birds and fish that are in the yard. One of her favorite things to do this summer was touch all of the different branches of the trees and smell the different flowers.

If I could pick one thing that I required her to do, it would be play outside. If you do not have a backyard, go to a park. If you don't have a park, bring the outdoors in. Let them plant seeds and see how they grow. Nature is the biggest most awesome thing a child may ever see. And it is your job to teach them to appreciate it.

Reading Time
I think pretty much every parent understands the importance of reading to your kids. Even my doctor asked to make sure we were doing it. I have been reading to Emma since she was in my tummy, so this is something I know she will strive in.

The important thing to remember here is not to force them into reading. So many kids will want to read but when parents put too much pressure on them they lose interest quickly. You simply have to provide them with the tools and if they see you taking time to read they will want to too. Hopefully. (Isn't parenting exhausting?)

Art Time
This is a new one we are working on. Every day before bathtime (if it is messy) or after dinner (if it is something that can easily be cleaned up) we are doing some sort of art or craft. This can get a little expensive, so buy in bulk and only get things you can do for multiple projects. If you're getting to a point where you want to spend a little less, all a kid needs is crayons to do so many activities and they are cheap. Coloring for example leads to a million possibilities. There are also a lot of crayon melting projects.


Even if it just taking ten minutes out of our day, crafting with kids can teach so many lessons. It is possible to make a mistake in art and still have it turn out beautiful (an important life lesson.) It teaches them to care for their art materials or they may not have it again soon (if they break all their crayons they can't color until they've earned some more). It is also a way for them to express themselves. Emma loves running around and pointing at all the things she made.

Dramatic/Imaginative Play 
This is something we don't get to do on a daily basis because she is so young and doesn't really get the imagination part. But it is essentially dress up and pretending to be characters. For example, she has this baby stroller where she takes baby dolls around the house and when she passes us she says "Bye!" like she is actually going somewhere. She isn't, and therefore is pretending.

This is easier with older kids, but it is still something I'd like to incorporate as much as possible.

Monday, December 2, 2013

Every Day Is a Chance to Create ♡

So I have been trying really hard to get Emma on some kind of schedule where she does some fun learning things each day like art time, reading time and other specific play times to help her develop and explore her new world. I saw each and every one of these ideas on pinterest, some of them I tweaked, some of them I didn't. All the links are in my pinterest under my holiday board if you are interested in seeing the original post.


Fingerprint Snowmen Christmas Bulb
What you need:
An ornament
White, orange, black paint
Small paintbrush
Tiny fingers
 
What you do:
It's pretty self explanatory but you just have to have your little one paint white (I used Crayola finger paint, but you could probably use any if you washed it off really quickly.) all over their hand and carefully grab the bulb. Emma's hand slid up a little, making her fingers look kind of short, but still adorable! Then you have them, or do it yourself if they are too little like Emma, paint the hats, scarfs, eyes, buttons and nose on their little snowmen. Let it dry and WALAH! You have a meaningful ornament you'll remember forever.
 
 
Handprint Wreath
What You Need:
Some sort of paper, I used a 11x14 canvas
Green (Red is optional) fingerpaint
(optional) Glitter sticker letters
What You Do:
Again, pretty self-explanatory, but you draw a circle in the middle of the canvas to help guide you and your child. Dip their hand in, or paint on for a little less mess, green finger paint. Have them press their hand along the circle until you have what looks like a wreath. Then have them dip a finger in red for the berries. You can get creative and draw a bow if you want too. Then, either you or the kids, stick the letters to the bottom and vwalah! Adorableness.
 
Glitter Snowflake Ornaments
What You Need:
Popsicle sticks
Glitter
Mod Podge or Glue
What You Do:
Again, this depends on the age of the kids. Older kids will be able to glue the popsicle sticks in the shape they want, but for Emma who is 1 and a half, I did that part for her. Then you simply paint mod podge or glue on, and let them drop the glitter on. Older kids can paint designs on in glue. But this one is particularly great for the little ones because they get to play in glitter and it is really hands on for them. Emma was bawling when we were done because she wanted to keep doing this craft, so we ended up doing several layers.
 
Melted Crayon Ornaments
CAUTION! This one needs to be done by or under supervision of adult. Possible burns!
What You Need:
Crayons (try to use the broken ones!)
Clear Ornament
Hair Drier
 Oven Mitt
What You Do:
Break up the crayons into tiny pieces and stick them inside the clear ornament. We started off trying to do one color at a time, but obviously that just melted for the second layer, so put all colors in at once. If you want one color to be more dominant, just add more of that crayon. Hold the ornament with a pot holder, I do not recommend letting your kids do this part because it gets hot, and put the blow drier near it. Rotate the ornament until the crayons look how you want them and you're all done!
 
What kind of activities do you guys do with your little ones? Any tips on getting Emma on a learning schedule?

Thursday, November 21, 2013

Pandora's Genetic Box

Below is something I wrote for my Biology 1101 class after watching a movie featuring James Watson and his opinions on genetic engineering. These are my thoughts and opinions, along with some poorly cited parts of the movie. Please feel free to give your opinions on the subject below, but any disrespectful comments will result in the user being banned from the site. I appreciate varying opinions and would love to hear them, if you don't please be respectful anyways.


"Pandora’s Genetic Box

            Pandora’s Box follows around one of genetics most credible people: James Watson, and asks him the important questions of where today’s technological advances should be taking us. His very controversial answer is to the maximum of genetic alteration. Watson believes that we should use our growing knowledge of the building blocks of humans to alter genes and genetically control our evolution. If your child has an unfavorable genetic disease or illness Watson believes parents should have the right to abort that child. Watson believes people are ignoring the important truths of genetic science because they are afraid of change.

            Personally I can believe a lot of what Watson said although I do not agree with most of it. I can see how someone who is a pure evolutionist can say what he was saying. I think in order to have an educated opinion a person has to be able to see the facts of both sides before they can make a rational decision. While all of the things Watson mentioned, like changing DNA in an embryo in order to avoid abortion, may be said with the best intentions I do not think it is a path humans are ready to venture down if we ever should.

            The ability to alter things genetically is a road that is paved with nothing but good intentions. Watson says those who oppose who simply do not understand what they are trying to do. But it is too uncontrollable to pursue. Take the example of birth controls that are offered for women. Through numerous testing the drug was made safe for women and it was sent into the public through ads on television. Now ten years after the new drug was released you see ads asking if you had experienced several diseases or birth defects as a result of the drug that is no longer allowed to be offered and if you would like to be a part of the class action law suit. Who is to say the same thing will not happen with genetic enhancements but it will be too late and too severe to remedy. In the film Mario Capecchi even mentions going as far as adding an extra chromosome to humans. I cannot fathom something that would be a bigger mistake than messing with human chromosomes. Something that has been working and evolving on its own all these years does not need to be altered because humans believe they have the ability to. Until we can understand literally every aspect of the human DNA and the human brain and body to see if there is anything that can go wrong, it does not need to be attempted. How can people say that they know how to do it and that the effects will be positive if there is still so much about biology and life they do not understand? I am just a young woman in a first year college biology course, so I am not even trying to pretend to be knowledgeable on the subject, but it seems to me that sometimes people who do not know it all sometimes have the best view points because they are completely unbiased.

            As far as genetically altering plants, like what is done at the Monsanto Corporation, I believe this is also testing risky waters. We have no idea what the long term results of putting unnatural genes into our systems will be. Several hundred years from now we may be able to trace a new terminal illness to those with grandparents who ate or worked with genetically altered foods. However, I can see how the short term results are almost undeniable. The ability to end world malnutrition is at our fingertips.

            I cannot help but think the money is being spent in the wrong way. Millions of dollars are going into the research to be able to add an intelligence gene to children and while I think that is amazing, what if half those funds went to nourishing and education the children of today? What if instead of focusing on how to be able to genetically make it easy for a child to learn we focused on feeding children and helping families have the time to teach children. There is a reason the wealthy are always more intelligent than the lower class: because the lower class has to focus on what they will be able to eat that night and are only given access to poor education and the wealthy are given food that is meant for the body to process and taught at a level to be able to go to an ivy league school.

            In my opinion the world is in trouble no matter which way we go, and I can only hope people start asking the right questions again before it is too late."

Monday, October 28, 2013

Where I've Been

      I can't believe it. I turned around and summer was over, school was starting for me, and suddenly I didn't have a moment to spare. Not to read, not to blog or do Chapter Chicks things, only to take care of my baby girl (who is rapidly becoming less and less of a baby) and do the mountains of homework I have daily.

    Not that I'm complaining, but having a kid and trying to be in school is almost impossible. You can just kiss having a social life in the tuckas. Kiss having time to yourself goodbye and kiss having hubby time WAY goodbye (since mine is in school now too). When Emma was first born it was a breeze because she slept so much and even when she was awake she didn't move, but now if she isn't in the mood to play by herself or napping I can barely have time to open my chemistry book, let alone solve quantum mechanic problems.

    That being said we did force ourselves have time to go on vacation to Gatlingburg, TN with the great-grandparents, an opportunity we couldn't pass up. I will do a whole post on that since it was Emma's first vacation but here are two of the Old Tyme photos we got taken.


     Come on, aren't those about the cutest things you've ever  seen? We had such a good time eating delicious food and showing Emma all of the amazing things. So as a parent, our vacation was a huge success, but as a vacation it was not restful at all. I stayed up late after Emma went to bed every night to do vacation-y things like read and watch movies with Joshua, but still had to get up, no sleeping in for this mama! But I'm so grateful we were able to go.


     We also made a trip with my mom, dad and nephew to the zoo before summer ended. This little girl loves her animals.

     Not much has changed on the house, but we have started getting the ball rolling again. We just bought the wood floor for the living room, kitchen, hallway and laundry room. And we are trying to wrap up all the drywall mudding but it is taking forever especially since it is getting so cold.

     Emma is super healthy and apart from being busy we're all doing good. I promise to write more, even this little update is such a stress reliever. How has your fall been so far?


Monday, May 27, 2013

Work Out Update (1)

So I have been really trying to keep track of my working out so I can see what I'm doing that's working or what I'm doing that isn't working. O I figured it would be a fun thing to share on here and help me keep track of everything. I started this whole work out thing on a Wednesday, so my days are a little off. But it is proof you don't have to wait until a Monday!

Starting weight: 140 lbs
Starting Size: 8-10

Day One, Wednesday:

Elliptical
Level: 10 Time: 30 minutes Distance: 2.2 miles

At-home Sit-ups 
6 sets of 25 reps / total: 150

Gym Sit-ups with 4lb medicine ball
2 reps of 25 straight
5 reps of 10 to each side

Day Two, Thursday: 

Elliptical
Level: 10 Time: 30 minutes Distance: 3.1 miles

Gym Sit-ups with 4lb medicine ball
4 reps of 25 straight
5 reps of 20 to each side

Side-ups with 8lb weight
50 to each side

Day Three, Friday:

3 mile hike with the hubs


Day Four, Saturday:

Break Day

Day Five, Sunday:

Break Day

Friday, May 24, 2013

Old Candles to Glass Storage

There are some really beautiful candles out there. But apart from making your own candles with the glass jars, there isn't much to do once the candle burns out. Or is there?


What You Will Need:
Used up glass candle jars
Boiling water
Knife

Begin by taking your knife and cutting slits in the candle wax all the way to the bottom. Make sure you do a line around the outside of the candle to help the water get underneath the candle easier.


Put your boiling/extremely hot water in the candle and allow it to soak for several minutes. You can see that some of my candle is already floating to the top. Some of it won't float to the top however, so if you're getting a little impatient (I always am when it comes to waiting on crafting) just wait a few minutes and scrape the knife around the bottom again. Odds are it will come loose a lot quicker.

When you pour the water out of your container, please make sure not to pour the wax into your sink. Clogged pipes equal bad times, and who wants to explain the the plumber why there is candle wax lining your pipes?


My pictures didn't come out too clearly, unfortunately there is no natural light in my current kitchen. New house, why hast though taken so long to finish? But you can pretty much use these candle jars for anything now. I have some Wal-mart candle jars storing some green teas in my kitchen. It looks so neat to be able to see the teas I'm choosing instead of having them stored in a gross box stuffed in a cabinet.


And then I have a bigger candle jar storing some spring nail polishes in my room. It is a really cute way to have my frequently used polishes of the season out on display and right within my reach. As a mom I have limited time to paint and dry my nails, but as a 22-year old girl, I have a strong desire to have them painted. Sigh, its a constant battle.


I hope you guys enjoyed the tutorial! If you would like to see how I did the label on the nail polish jar check this post out! If you try these out please show me some pictures on instagram or twitter with the hashtag #thesaylors! I'd love to see some awesome ways you guys use your candles for storage.

Wednesday, May 22, 2013

I, I, I, I work out.

So I've been feeling rather on the chubby side lately. I don't know how it's happened, but a year has passed since I've had Emma and while I technically lost the baby weight after only a few weeks, I never  really lost the belly or extra flab. I weigh what I did pre-pregnancy, but it just doesn't look the same.

So, I'm gonna vlog/blog my weight loss progress. Whether I am actually progressing or failing miserably. 

Today was a total positive, even if it resulted in me having a major migraine.

The first thing I did, which is different than my normal gym routine, was run for thirty straight minutes on the elliptical on level 10. It was awful, I got really dizzy, but I'm still glad I didn't stop the entire time.


That's me as red as a tomato after I got done. Can you see how fake that smile is? I wanted to die.

I also did 100 sit ups on the machine, and had done 125 regular floor sit ups before I went to the gym. Abs of steel here I come! 

I did pretty good diet wise today too. I'm not trying any crazy diets, or even counting calories, because I really want to keep eating healthy. So I'm just trying to find healthier ways to do everything.

The one new healthy diet thing I would say I could not survive without this week is my magic bullet. 


I make so many smoothies on this thing that help cure my cravings for sweet things and they are so super yummy and good for me that it is a win win win! I strongly recommend getting some kind of blender if you're trying to eat healthy. You can make vegetable juice without a juicer, make smoothies, blend up some stuff to make salsa. The possibilities are endless. And there is something great about knowing what you ate didn't have any preservatives and was natural. 

Anybody have any smoothie recipes for me?

Tuesday, May 21, 2013

D.I.Y. Vinyl Lettering - No Machine!


So, unfortunately for me, Christmas passed before I learned of the magic little label genie called the Cricut. Boy howdy do I want one of those, but until the day I find two hundred dollar bills laying around I probably won't get one. So I have to get a little more crafty in my label-making abilities.

(I had already done the flour one as a tester before I did the rest)

So, there are several things around the house I wanted to add a little flair to. The first thing was these kitchen canisters. I got them for my wedding, and so far they've just been sitting on the top of the fridge (I have the smallest kitchen known to man, literally only two counters) and they look incredibly boring. So I wanted to add labels and make them look a little more organized.

So the first thing I did was to write out exactly what I wanted the labels to say and look like, thickness and everything. You can see where I messed up on the s for sugar a few times.

Then you need to cut out your little drawings.

After mine were cut out, I took scotch tape, and taped it face down to the back of the vinyl.

All that was left to do now was to cut around the paper and through the vinyl so the letters were cut out and ready to be stuck to things.

So at this point all I had to do was peel off the back of the vinyl and stick it to the clean surface I wanted it on! Yay!

I did all three canisters that are in use:


My doggies water and food bowl. Can you see the rain drops for water and the doggy bone for food?

And I put a cross on our still in progress first aid kit!

Are those cute or what! I can't wait to find more things to stick my labels on. I paid $7.99 for two large sheets of plain white vinyl at Hobby Lobby and it is one of my favorite craft purchases so far!


Disclaimer: I had this posted on an old blog of mine, That's Sew Crafty. I decided to move it over to my current blog. All images and words are my own.

D.I.Y. First Aid Kit


Something I think every household needs is some sort of first aid kit. Whether or not you just have some band-aids in the back of your medicine cabinet, or if you have a fancy complete ready to buy one, I'm sure that you have some sort of first aid on hand.

The only problem with having it all thrown into your medicine cabinet is its accessibility. Who wants to rummage through old toothpastes and empty prescription bottles to find a band-aid when your child is screaming from a scraped knee? Or if you accidentally touch the oven when putting in those delicious cookies you baked from scratch? (okay, okay, or pulled apart from the frozen package) Having your first aid materials all in one place is convenient in times when you already have something else on your mind.

Now what you may be thinking at this point is, where am I gonna find the cash to buy a first aid kit? Those ready-made ones can be pretty pricey, and usually only come with small amounts of each thing, when you really need more than ten band-aids.

My suggestion to you is to make one yourself. Each time you go to the grocery store you can buy one or two items off your list of must haves, starting with the frequently used items, and slowly build up everything you'll ever need.

What I suggest you buy:
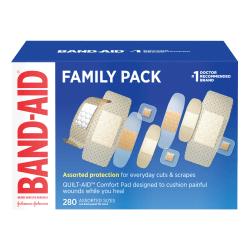
Band-aids of various shapes and sizes; how many times do you end up with a paper cut, or a child with a scraped knee? Band-aids are simply a part of every family household, and they are a necessity for first aid kits.

• Gauze The only time I have ever really used gauze is on my husbands really bad sports scrapes (and he hates it) or when I get poison ivy to keep the medication on the infection and to stop myself from scratching and spreading. Whatever you use it for, its really good to have laying around.

• Gauze pads These are incredibly handy for the times you don't need to wrap the whole appendage but a band-aid just won't do the job.

• Bandage tape Well you can't use gauze without being able to tape it down can you?

• Safety Pins This one really isn't a must have for your kit, but it will certainly be useful to know exactly where some are in case of emergency.

• Disposable Latex Gloves These are also really important. Say you have one of you friends children over for the night and they scrape their knee. You'll want to put these on to protect yourself from germs. Or if you have a mouth emergency. You don't want to be sticking your unsanitary hands around in there.

• Scissors Obviously scissors have a variety of uses. They can cut the bandages, cut clothes of more serious injuries, pretty much anything.

• Tweezers Besides always knowing where some tweezers are, I imagine these would be useful to get rocks out of a scraped knee, broken glass out of a teeny bare foot, or splinters out of your little boys fingers.

• A Small Cup I actually suggest a couple small cups, so you can dispose of them after a use. Unless you are just planning on washing them. But these are good to fill with a little water to take aspirin with.

• Antiseptic Spray The most important thing when treating a wound is making sure you keep any and all germs out so there is no infection. Having this spray on hand makes sure you won't forget to spray it on your hands before touching things (even though you always promise your kids you won't touch it if they just let you see it, and your first reaction is to touch it immediately) and to sanitize around the wound quickly.


• Burn Ointment This is one I have used a few times. There is nothing like singing your finger on the oven or a pan you forgot was hot. Nothing can take away that burning sensation like burn ointment. So this is something I plan on having access to right away.

• Aspirin You should keep this separate from whatever you use on a regular basis. That way you don't run out and you have this emergency stash, because you never know when you'll need some quickly. *Note* any kind of medicine needs to be approved through a doctor before consumed especially when it is for a child.

• Calamine Lotion Ever had poison ivy? A few mosquito bites? Then I don't need to explain the importance of this cooling magic gel.

• Aloe As your typical girl, I have spent plenty of time trying to get that lovely bronze glow from both the tanning bed and from the suns natural light. And as a completely pasty white person, I have been sunburned more times than I can count. The only thing that soothes it or the itching that comes with tanning beds is aloe gel. It is a must have for me.

• Thermometer This is an obvious one, its always important to keep your temperature under control. Especially if there is a child or (like me) a pregnant woman around. A serious temperature can cause a lot of problems and having a thermometer on hand allows you to keep it under control.

• Hot Water Bottle When you have a sore spot, the best thing to do is to alternate colt and hot, but you can't do that without someplace to keep your hot water without burning you.

• Ice Packs Important for the same reason above. Nothing makes a sore spot or a wound feel better than when you put some ice on it.

• First Aid Guide All of this stuff is pretty useless unless you know how to use it. And even if you know how to use it, it doesn't mean the baby sitter does, or whoever is opening your first aid kit. So this is really handy to have around.

Something else you will need is some way to keep all your first aid items in one place. I opted for the super cheap tub you see in the top picture, it was only a dollar at the dollar tree (that store is a magical place.) and then I added a vinyl label. But you can really do anything you want with it. Large food storage containers, pretty baskets, the sky is the limit. Just make sure you keep it out of reach of the little ones!

As a disclaimer I would like to say I originally had this posted on my original blog, That's Sew Crafty, all content is written by me. It was just on my other blog originally. 

Monday, May 20, 2013

D.I.Y. Twine Bottle

So I had myself a little wine night the other day, and ended up falling in love with this bottle. It has an elongated neck, and it is gorgeous. So I knew I was gonna keep it for a project.

I really love the light rustic country look that is trendy right now. All the homes that utilize this have a very homey feel and I really have been trying to find our homes style, and I'm dying for this to be it. I have some decorations already on my entryway table that are rustic, but this twine bottle really completes the look. These things are oodles of money at the store, so my D.I.Y. Saved me a lot of money.

All I had to do was buy the wine bottle, which I had no problem doing. Emma was with Granny for the night. So I had myself an Office marathon and woke up with all the materials I needed to do this awesome craft.

Materials Needed:
Empty Wine Bottle
Twine
Hot Glue Gun/Glue
Scissors

Time Needed:
About an Hour


I began by placing the end of my twine on the bottom of the bottle and hot gluing like crazy! Don't be shy, you're going to want this to be super sturdy. Give it some time to dry and continue.


Then I put a thin line of hot glue around a potion of the bottom of the bottle and put the twine in place before it dries. You have to be kind of quick here, hot glue dries fast!


Placing my hot glue gun tip directly beside the already glued twine, I added another line of glue.


Again, like before, I quickly pushed the twine on top of the glue and repeated the process all the way around the bottle. The twine eventually goes up...


And up...


And up the bottle until you are finished. It was a very lengthy process, I almost quit and took a break just because I was getting bored but I'm glad I stayed put and finished the project.


Get the twine all the way to the top and cut it, leaving about an inch or two of excess. Then stick the excess inside the bottle and pour some hot glue in there. It really rounds the look off when you go all the way to the top.


And WA-LA! You're a crafty master and saved a ton of money. Two things this little mama loves.