Sunday, May 25, 2014

House Update (2)

So over the years we have been working on our house. Completely remodeling it. When we first got married and pregnant we lived in an apartment, and my aunt moved out of Grandma's house (built in the 70's and not been redecorated since) that she pretty much destroyed because she couldn't care for herself. So we decided we would tackle the huge task of completely remodeling the house. We thought it would take a few months. I think we're going on our second year. But, the finish line is finally in sight!


So this is the bathroom. We took out two closets to enlarge it and are still in the process of drywalling this. Finding a plumber was a total pain. The sink is on the left, and then a toilet. On the right there is a huge open closet kind thing for blankets, towels and other toiletries and then the shower/tub. It is going to be great when it is all finished, I just want it there!


This is Emma's room. We painted the top blue and the bottom green because we're doing Lorax trees everywhere. We're planning on having a whole Doctor Seuss themed toddler room until she is a pre-teen. This is unfortunately one of the rooms we had to take a closet from, so that will certainly be interesting to lose the closet space.


This is my mom tearing out the paneling in this room. We had to tear it all out and drywall a lot of it ourselves. Mudding and sanding is a real pain in the butt.


This is our bedroom, nothing really special about this room. Look at that new carpet and drywall though. Fancy fancy!


Above is the extra room. This one is going to be the most trouble because I'm picturing craft room and Josh is picturing man cave. Also every time we can't think of where something belongs we decide to stick it in here. And its the smallest of the rooms. Oops.


This is the hallway, pretty self explanatory. We got the floating hardwood looking floor to put throughout here, the kitchen, the living room, and the utility room.


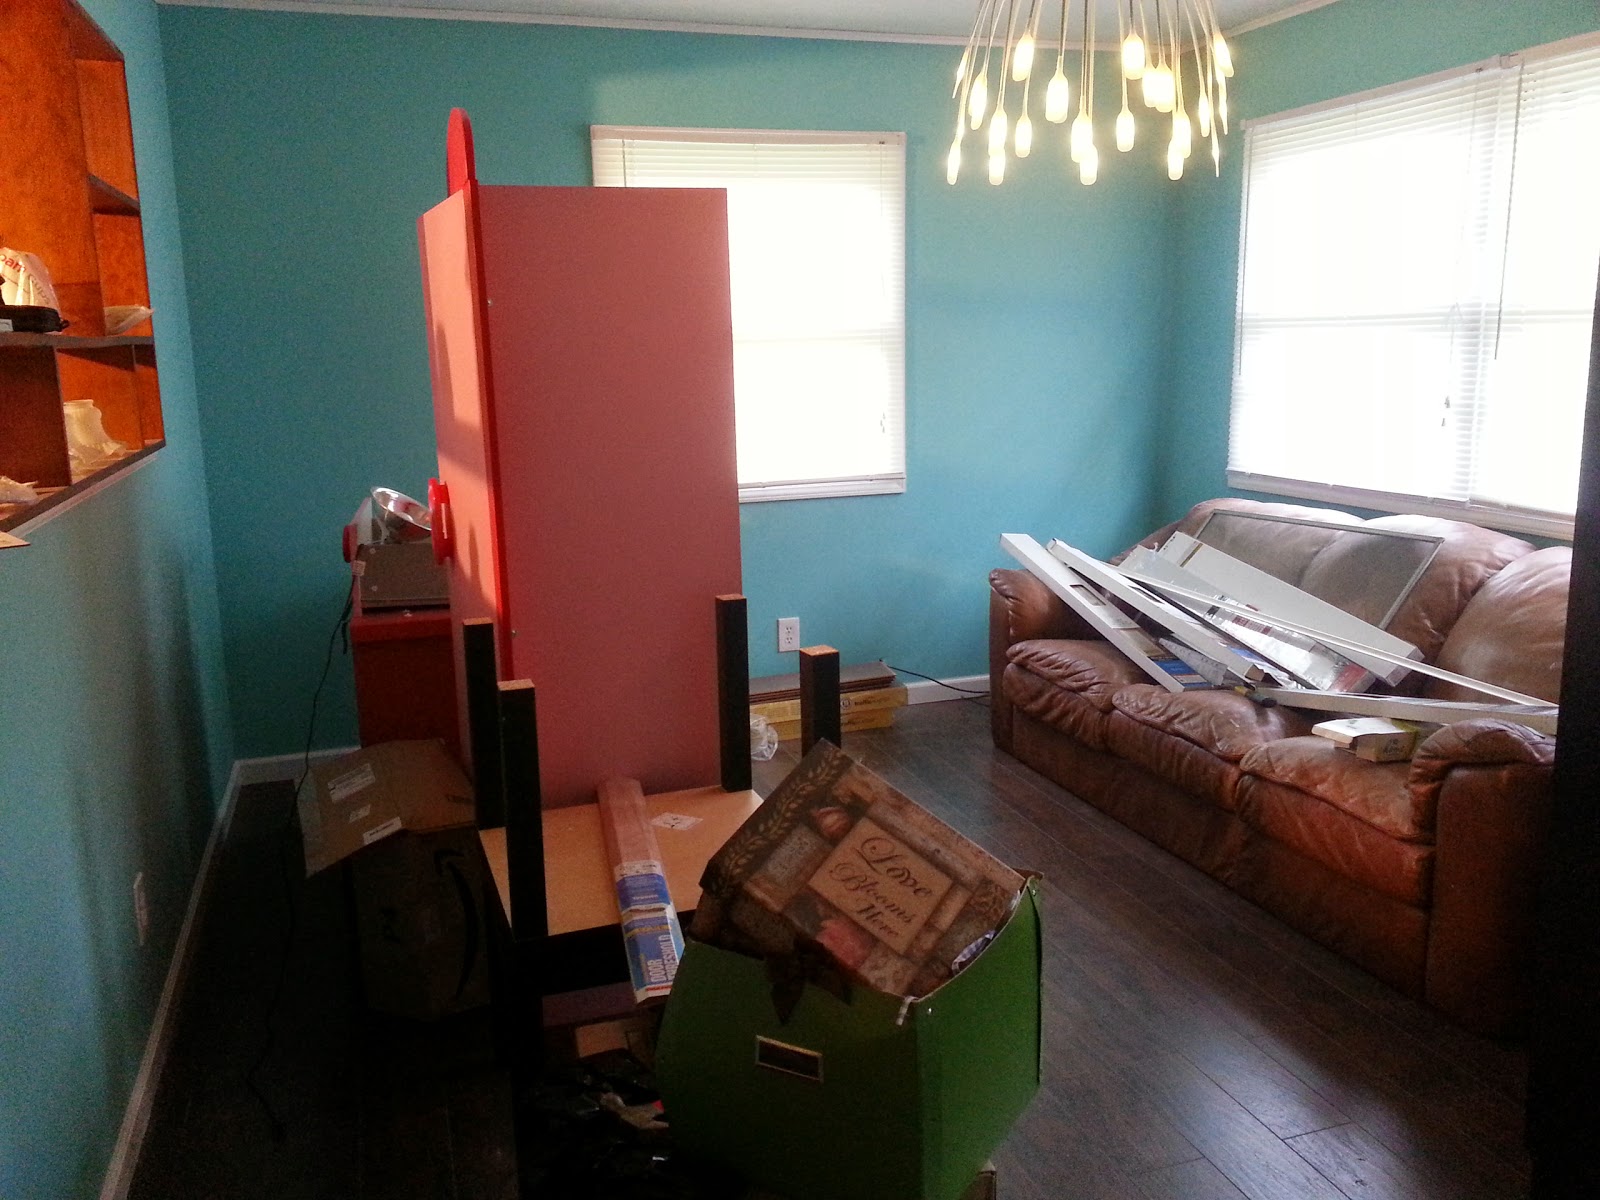
This is our living room! Are you loving the lamp from IKEA?


And finally our kitchen! The middle picture is what it looked like after we ripped everything out. Pretty crazy. We just have to get appliances, have the plumbing hooked up and paint the cabinets. I'm so excited! 

The only thing I didn't get a picture of was the laundry room. It completely slipped my mind. I plan on doing a lot of posts on all the processes so stay tuned!

Thursday, May 22, 2014

Washi Tape Planner Inspirations


Washi tape. We all know it, we all love its incredible versatility in the organizing/crafting/generally making things prettier world. I am pretty new to the concept of it, and haven't done half the crafts I plan to do with it (I want to use it all, but I don't want to run out... its so pretty!). But, my dad Santa got me a cheapie planner for Christmas, and I haven't used it yet because it is so plain and boring. And then it hit me, time for some good old Augustus style inspirations right smack on the front of this baby. It's pretty self-explanatory but I just ripped pieces off and wrote them on there. 


It turned out exactly how I wanted it to. Messy, unorganized and perfect. I also use washi tape to organize the inside of my planner (which is why I had it out in the first place) so it is all matchy-matchy and awesome!


Now that our house is finally getting seriously close to finished, I also started working on my family binder! I had one at the apartment, but it ended up getting unused with my newborn and then loose and messed up. So it is time to get everything kicked back into gear! Posts on this soon enough!

Sunday, May 18, 2014

Agency D3 | VBS 2014 Spy Camera Decoration DIY


So this year is the first year I am seriously volunteering at my church's vacation bible school. Last year I helped out in the nursery a few days, but this year I have volunteered to be an assistant in the 4-5 year old room. I couldn't teach because I wasn't a member (until next Sunday when I'll be BAPTIZED!) plus I consider myself a very new student so I just thought it would be fun to assist in a classroom.

But this year's theme is Agency D3, where we are secret agents discovering the secret messages of the bible. I love it. Its such a fun idea and a way to get kids interested in coming. What kid didn't play spy or detective when they were little?

So I am going to be doing a whole lot of homemade crafts for the classroom. Unfortunately, our budget isn't huge (a whopping $15 per classroom) which means in order for it to be a lot of fun and look really cool, it isn't just time I'll be donating. But, I don't have to break my bank because there are a lot of things that can be done with what I have around the house and dollar store items!

My first project is: a Spy Camera! 


This will be great because it looks like a surveillance camera hanging in the room and if there are a couple it can be a really cheap project that adds a little touch.

I started off with simple objects I had around the house, mostly boxes. I actually didn't have to purchase anything to do this.

The first thing was a garbage bag box. Just a simple Kroger box. But any box the size of a surveillance camera will do. I also got a toilet paper roll which makes the lens.


So, all I did at this point was cut the toilet paper roll in half and tape it onto the smallest side of the garbage bag box. I used transparent packing tape because that was the strongest stuff I had around and I am too impatient to wait for glue to dry. 


If you want to be done and skip the next steps that is a-okay. If you want to add more and can come up with even cooler designs I am jealous, but again that is the fun of this craft. You can use whatever you have laying around to make your camera look even more high-tech. I had a limited amount of time to hunt around for extra supplies (Emma's naptime was nearing an end) so I just grabbed one of the first tiny boxes I saw. Which happened to be a box of birthday candles leftover from the kids.


I taped it on the top so it looks like an extra little gadget attached to the camera. I also made it so the tape stuck out and didn't adhere to the side of the candle box. I thought it would look like a strap and I am pretty pleased with the results.


Finally, I just took it outside and gave it a good coat of silver metallic spray paint. I used my favorite Rust-oleum brand. I bought this color and gold metallic, and I know I'm going to use it over and over. It leaves a real metal looking finish!


And wa-lah! Your project is complete and you have a free (if you already have the spray paint) prop for your vacation bible school class or a secret agent themed party!


Saturday, May 17, 2014

My Week in Work Outs {Day 2-3}

Day Two
Wopwop. Day two sucked. Josh got the stomach bug we have been passing around, and therefore I was out one sitter therefore making it impossible for me to go to the gym. I had some home workouts planned, but I was exhausted from being up the night before and decided to just take a rest day. But, important workout lesson learned: life happens. There is no need to stop working out or feel down about yourself if your workout schedule doesn't go as planned. This is a lifestyle change, therefore, there will be ups and downs. Work out again another day.

Day Three


So I'm late in posting it, but yesterday I did make it to the gym. I didn't want to. I wanted to sit at home and do nothing. But I got my lazy flabby butt up, and I worked it! I felt so sore and dead and tired good when I was done too, meaning it was all worth it.

I did this baby again. The dreaded treadmill. But instead of doing the stairmaster for fifteen minutes first, I inclined this treadmill to its max (15%?) and walked uphill for ten minutes. Then I began my run again. This time I ran 6.5 for the first half mile, alternated between 7.0-7.5 for about a mile plus a quarter, and sprinted the last quarter mile at 8.0. This stank. It was hard, and I admit I stopped for one second. But when I was done I felt so victorious. I am going to try the same thing later today. I just keep thinking that I am coming to the gym to kill myself with my workout, and that mindset usually helps me get through it.


Then I did the torso rotation again. 25 on each side at 60 pounds. This hurt, but in a good way. I can definitely feel this one in my abs today.


 I also did another machine I didn't get a chance to snap a picture of because the gym was super packed and they only had one. This is a picture of the version at Planet Fitness, but this is essentially the same thing. It is this really strange thing to help assist sit ups. You sit on it with your knees above the left cushions and your feet under the right ones. Then it allows you to have more range when you do your sit ups. I also add a medicine ball so I am also working out my arms. I did 75 of these with the medicine ball, and 25 without.


I ended my workout with this machine, which you sit on, grasp the handles, and use your abs to lean forward. I did 50 of these, but I don't remember the weight.


Have you been getting your work out on with me? It is super hard, but hopefully it will be worth it in the end!

*Disclaimer: I am in no way a doctor/physical therapist/workout expert. I am simply sharing my work out experiences. Consult with a doctor before beginning any work out routine and know that what works for me may not work for you.

Wednesday, May 14, 2014

My Week In Work Outs (1)

Starting Weight: 143 lbs
So this completely awful (does my nose really look that big?) after work-out bathroom selfie is a way for me to start off my new series on the blog! My Week in Work Outs! I have tried doing this before but ended up moving in with my mother and never working out, but now that I'm really trying to pick up my work out pace, I think this will be really fun! I want to be able to try out all kinds of different diet/workout routines and this is my way to share what I find with you guys and also have you guys hold me accountable. I'm going to do the first week in days that way it is easier to see what I mean later on, but after that this will just be a weekly post. It's possible I'll only do a few weeks but it is better than nothing!

Day One:

I started off the day by fifteen minutes on the stairmaster, level 10 incline and 100 intensity. I did this for fifteen minutes but wasn't really "feeling the burn" so I wanted to switch to something a little more high intensity cardio-ish. So, in my creative mind, I hopped on the treadmill. Wopwop. But I ran 2 miles, the first mile at 6.5, the next half mile at 7.0 and the final half mile at 7.5. I feel like this was fantastic for my first day back. My goal is to "kill myself" at the gym every day.


I made the mistake of not going to the gym with a plan, so I ended up wasting a lot of time meandering around wondering about what I wanted to do. So I ended up just doing some leg stuff. Pretty boring. But first I did this little number, the torso rotation. Blech. More like death in a fun twisty game. I did 25 of these on each side with the weight at 30. 


Then came the thigh squeezimajig (a really technical term). You sit on this bad boy, wrap your legs around the two pieces and squeeeezzzzeee. It hurts. But inner thigh gap here I come! I did 50 of these with the weight at 70.


Then the opposite of the spectrum came along. The side butt pusher (I'll look up the real names of these, I promise). 


In this exercise you basically sit in between those things and use your outer thigh/side butt muscles to push it out. This one gives me a cramp every time so there is a big possibility I'm not doing it right. But I did 50, 20 at a weight of 70 and 30 at a weight of 60 because it was really hurting. I couldn't walk for like an hour.


Working out sucks. Looking/feeling fantastic is worth it eventually though. So I am trying really hard to stick with it this time and maintain a healthy diet. Because it is up to me to be a role model to Emma, and a rockin hot wife to my husband, and an all around more confident healthy person for myself. What reason are you hitting the gym this week?

My food goal this week:
Cut out all drinks but coffee and water.

*Disclaimer: I am in no way a doctor/physical therapist/workout expert. I am simply sharing my work out experiences. Consult with a doctor before beginning any work out routine and know that what works for me may not work for you.

Tuesday, May 13, 2014

I Saw It On Pinterest (1) | DIY Clothespin Picture Frame


I saw this project on Pinterest {specifically here} and I knew right away I wanted to try it out. It has taken me a while to finally get to it, but that is really how pinterest goes.

It begins with any old hunk of cardboard. I went into our cupboard under the stairs and dug out an old box from a grill we bought ages ago. I don't even know why it was still in there but WALAH it was and now I have some fancy decorations from it. Sometimes clutter is a win.


I looked around my house for two bowls that I could use to trace a large circle for the outside and a smaller circle on the inside. Simple enough. Then I had to cut them out. I just used a serrated knife and this was a breeze. I was a little worried about the inside circle, but using a knife instead of scissors made this a breeze. I didn't have to worry about cutting through the piece of the cardboard I wanted to keep or bending it to get scissors inside.


This is what I ended up with so far, pretty cool right? I was a little uneven in my bowl/tracing placement, but this can easily be avoided in your project and I don't think will be too noticeable once I add pictures. Next you have to glue on your clothespins. You want to make sure you glue them with the actual opening out to hold the pictures. I used hot glue and I don't recommend it.


Finally, I wanted to add some color instead of the pancake background. So I tried my gold metallic finish spray paint for the first time! I am going to be buying that stuff by the gallon soon because it is so fantastic. It made for such a great finished product. 


And here is the finished product! This was a lot of fun to do, I can't wait to continue to make stuff with that metallic paint. And this is going to perfect for my photo collage wall. It adds just enough flair! Let me know if you guys end up doing this project!